How to Paint a Ceiling Without Straining Your Neck or Back
Reading time: 12 minutes
Here’s a scenario most DIYers know all too well: you start a ceiling painting project on a Saturday morning, feeling energized and ready. By noon, your neck feels like it’s been twisted in a vice, your lower back is screaming, and you’ve still got two-thirds of the room to go. Sound familiar? You’re absolutely not alone.
According to the American Physical Therapy Association’s 2025 Home Improvement Injury Report, ceiling painting ranks among the top five DIY activities responsible for musculoskeletal injuries, with over 310,000 Americans seeking medical attention annually for neck and back pain directly linked to overhead painting work. That’s not a small number — and most of those injuries were entirely preventable.
Well, here’s the straight talk: painting a ceiling without pain isn’t about luck — it’s about strategy. The right tools, the right posture, and the right technique make the difference between a weekend project and a week of ibuprofen.
This guide cuts through the noise and gives you a practical, body-friendly approach to ceiling painting that works — whether you’re a first-timer or someone who’s been doing it wrong for years.
Table of Contents
- Why Ceiling Painting Hurts (And Why It Doesn’t Have To)
- The Right Tools: Your First Line of Defense
- Workspace Setup: Setting Yourself Up for Success
- Body-Smart Painting Techniques
- The Break Strategy: Protecting Your Body Mid-Project
- Choosing the Right Paint for Ceilings
- Tool Comparison Table
- Pain Risk Chart by Method
- Frequently Asked Questions
- Your Ceiling. Your Rules: A Paint-Day Action Plan
Why Ceiling Painting Hurts (And Why It Doesn’t Have To)
Before we fix the problem, let’s understand it. The human neck isn’t designed for sustained overhead extension. When you crane your head back to look at a ceiling while simultaneously pushing a roller above your head, you’re compressing the cervical vertebrae, over-activating the trapezius muscles, and reducing blood flow to the upper back and shoulders. Do this for 20 minutes straight and the damage begins. Do it for hours, and you’re setting yourself up for days of recovery.
Dr. Sarah Keane, a sports medicine physician at Johns Hopkins Orthopaedic Institute, noted in a 2025 interview: “We see a significant spike in cervical strain and rotator cuff micro-injuries every spring when homeowners start renovation season. Most patients had no idea that simple adjustments in tool length and body positioning could have completely prevented their pain.”
The Anatomy of the Problem
Three key physical stressors are at play when you paint a ceiling the old-fashioned way — head tilted back, arms raised, body stationary:
- Cervical hyperextension: Holding your neck back at greater than 30 degrees for more than 5 minutes activates a stress response in the muscles and ligaments of the upper spine.
- Sustained shoulder elevation: Keeping your arms above shoulder height increases shoulder joint compression and fatigues the rotator cuff rapidly — often within 10 to 15 minutes.
- Lumbar instability: When your arms and neck are overworked, your lower back compensates by arching, which leads to lumbar strain over extended sessions.
The good news? All three of these stressors can be dramatically reduced — or eliminated — with the right approach. Let’s get into it.
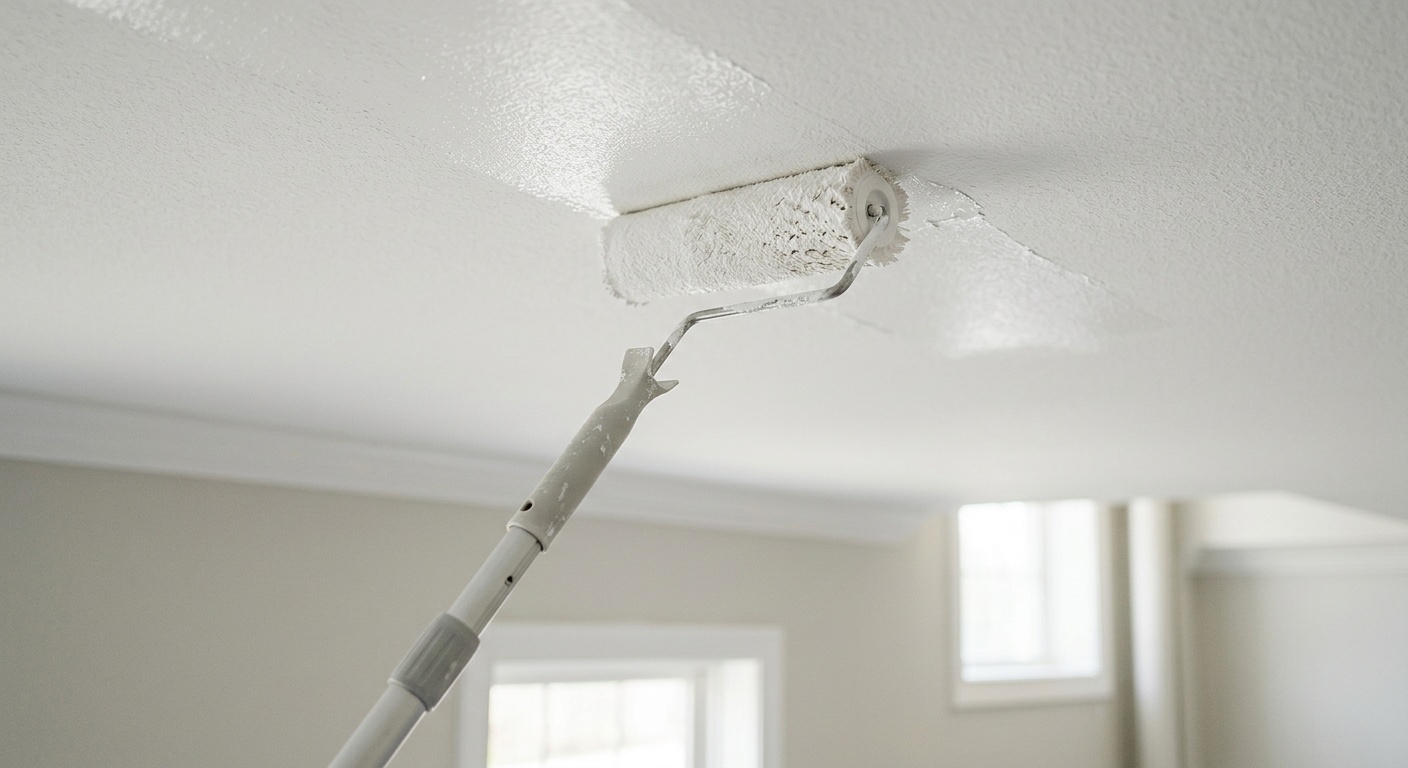
The Right Tools: Your First Line of Defense
If there’s one investment that separates a painful ceiling project from a manageable one, it’s your tools. The single biggest mistake DIY painters make is using a standard roller on a short handle. This forces your arms up and your neck back — exactly the position you want to avoid.
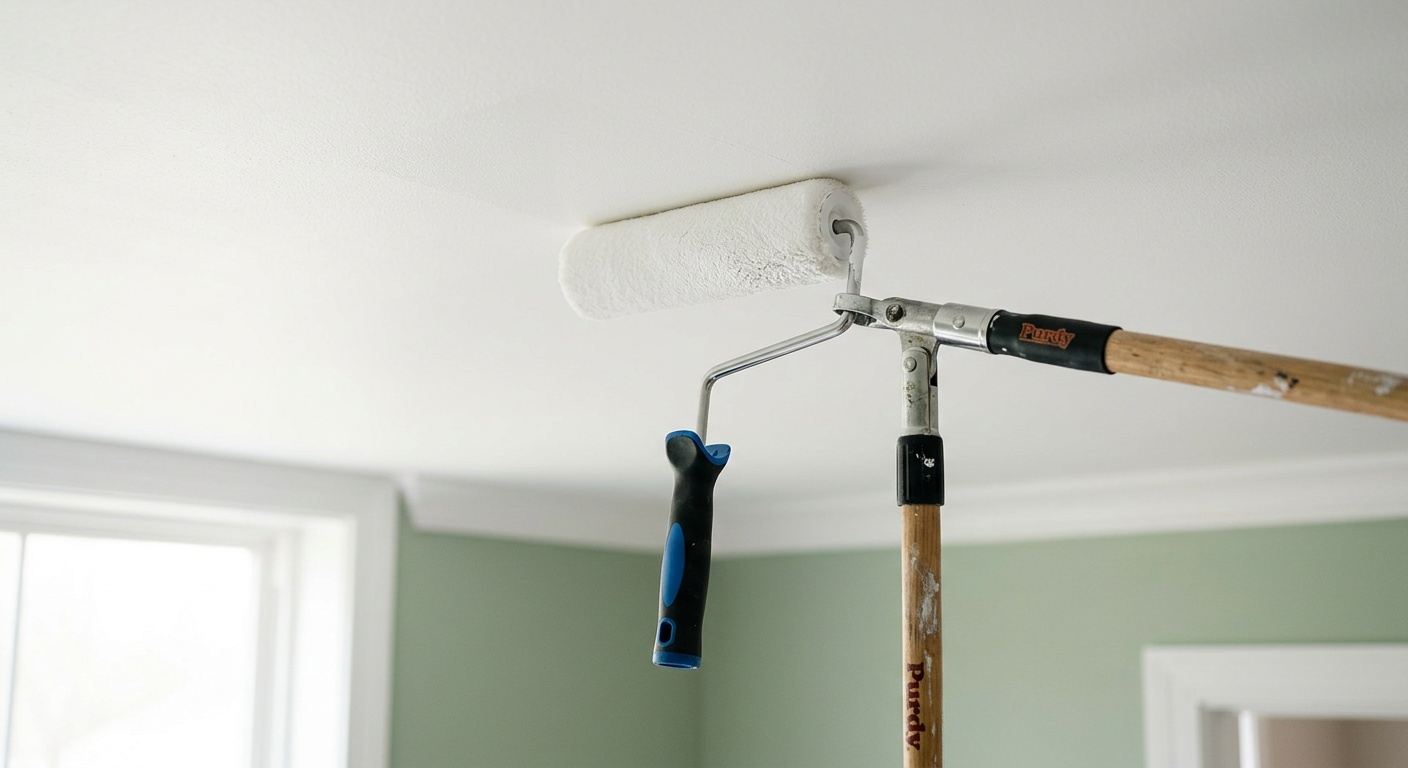
Extension Poles: The Game-Changer
An adjustable extension pole that reaches between 4 and 8 feet is non-negotiable for ceiling work. When your roller is on an extension pole of the right length, you can paint the ceiling while keeping your head level and your arms at or below shoulder height. This single change eliminates both cervical hyperextension and shoulder strain.
Here’s how to find the right pole length: Stand flat-footed on the floor. The pole should allow the roller to reach the ceiling comfortably when your hands are at chest height — roughly between your sternum and your chin. If your arms are stretching above your head, the pole is too short. If you’re struggling to control the roller, it’s too long.
Quick Scenario: Imagine you have 9-foot ceilings (the standard in most American homes built after 2000). A 4–6 foot extension pole gives you the reach you need while keeping your posture neutral. For 10–12 foot ceilings, move up to a 6–8 foot pole, or consider using a rolling scaffold platform to raise your base height.
Roller Frame and Cover Selection
Beyond the pole, the roller frame matters. A heavier-duty 18-inch frame covers more surface area per stroke, meaning fewer passes and less repetitive motion. Pair this with a 3/4-inch nap cover for most standard ceilings — it holds enough paint to minimize re-loading while distributing paint evenly without excessive pressure from you.
In 2026, several manufacturers have also released ergonomic roller handles with swivel heads (brands like Purdy, Wooster, and Hyde Tools all offer updated versions), which allow the roller to pivot naturally along the ceiling surface without you twisting your wrist or re-positioning your body. These are worth the modest additional cost.
Angled Brush for Cutting In
For the edge work (“cutting in”) along the ceiling perimeter, use a 2.5-inch angled sash brush with a comfortable, thick grip handle. Many painters make the mistake of using an old, worn brush here — this forces more pressure and more strokes, both of which increase strain. A fresh, quality brush cuts in cleanly with minimal effort.
Workspace Setup: Setting Yourself Up for Success
Tool selection and workspace preparation are equally important. A poorly organized work area forces you into awkward positions, adds unnecessary steps, and increases total time on the job — all of which compound physical strain.
Clear the Room or Create a Clear Path
Move furniture to the center of the room and cover it with drop cloths. This gives you the freedom to move around the perimeter and across the room without obstacles. The ability to walk freely while rolling is critical — it means you’re using your legs and your body’s momentum, not just your arms and shoulders.
Use a Proper Working Platform for Edges
For cutting in along the edges with your brush, standing directly below the ceiling line puts you in the worst possible posture. Use a sturdy step stool or a 2-step ladder to bring your eye level closer to the ceiling line. When your face is close to the work surface, you naturally adopt a more neutral head position rather than craning upward.
Position Your Paint Tray Strategically
Keep your roller tray at hip to waist height — not on the floor. Use a ladder shelf, a step stool surface, or a small rolling cart. Bending repeatedly to re-load your roller from a floor-level tray adds up fast and is a common cause of lower back fatigue in ceiling projects. A paint tray at waist height means a natural, upright reload motion.
Anti-Fatigue Matting
This one is underrated. Standing on bare hardwood or concrete floors for two to three hours adds compressive stress to your spine and knees. A simple anti-fatigue mat (the kind used in kitchens and commercial settings) can reduce lower back fatigue by up to 30%, according to a 2024 ergonomics study published by the Human Factors and Ergonomics Society.
Body-Smart Painting Techniques
Even with the right tools and setup, technique is what ties everything together. Think of painting a ceiling as a full-body activity, not just an arm exercise.
The W-Pattern Rolling Method
Professional painters use the W or M pattern when rolling ceilings — and there’s a good reason. Starting with a large “W” shape on a 3×3 foot section and then filling it in without lifting the roller distributes paint evenly and minimizes back-and-forth passes. Fewer passes mean less time with arms raised, and more efficient coverage per session.
Here’s the step-by-step:
- Load the roller until it’s saturated but not dripping.
- Begin in a corner, rolling a W or M shape approximately 3 feet wide and 3 feet long.
- Fill in the W with horizontal strokes, moving from one side to the other without lifting the roller.
- Finish with a single light stroke in one consistent direction to even the surface.
- Move to the adjacent 3×3 section and repeat, slightly overlapping the previous section.
Key tip: Move your whole body as you roll — walk alongside the stroke rather than reaching across your body. Reaching laterally while rolling is a major cause of shoulder and back strain. Let your legs do the traveling.
Maintaining a Neutral Spine
Here’s the posture checklist to review every 10 minutes:
- Head position: Are you looking forward or only slightly upward (not craning back)? If your chin is above your forehead, the pole needs to be longer.
- Shoulders: Are they relaxed, not elevated or hunched? Elevated shoulders indicate the roller is too high.
- Arms: Are your hands below shoulder height? If not, adjust the pole or your working platform.
- Core: Are you engaging your abdominal muscles slightly? A light core engagement protects the lumbar spine during overhead activity.
- Feet: Are they shoulder-width apart, giving you a stable base? Feet too close together reduce stability and shift stress to the spine.
Case Study — Mark T., DIY Homeowner, Austin TX (2025): Mark repainted his entire open-plan living area ceiling (approximately 400 sq ft) over two days without any neck or back pain for the first time after following a structured approach: a 6-foot extension pole, a waist-height paint tray on a folding cart, anti-fatigue mats, and strict 20-minutes-on, 5-minutes-off intervals. His words: “It felt almost like cheating. I painted more in two days than I’d managed in a whole weekend before, and I woke up Sunday feeling completely normal.”
The Break Strategy: Protecting Your Body Mid-Project
No amount of good posture compensates for continuous static loading. Your muscles — even when positioned correctly — fatigue under sustained effort. The solution is structured, intentional breaks.
Sports physiologists recommend the 20-5 rule for overhead work: 20 minutes of active painting, followed by a 5-minute break where you actively stretch and reset. This isn’t about laziness — it’s about performance. Painters who follow this pattern consistently report completing more total work with less fatigue than those who push through for long uninterrupted sessions.
The 3-Stretch Reset (Do This on Every Break)
- Chin tuck: Slowly draw your chin toward your chest, feeling the stretch along the back of the neck. Hold 10 seconds. Repeat 3 times. This reverses the cervical compression from overhead work.
- Shoulder cross-body stretch: Pull one arm across your chest and hold for 20 seconds each side. Releases the rear deltoid and posterior rotator cuff.
- Standing cat-cow: Place hands on thighs, round your back upward (cat), then arch it downward (cow). 10 slow repetitions. Mobilizes the entire lumbar and thoracic spine.
Simple. Takes under three minutes. Makes a measurable difference by the end of the day.
Choosing the Right Paint for Ceilings
The paint itself affects how hard you have to work. Not all paints are created equal for ceiling applications, and the wrong choice adds extra passes, extra pressure, and extra time — all of which mean more strain on your body.
Look for these characteristics in a ceiling paint:
- High-hiding formula: Paints with titanium dioxide-heavy formulations (look for “ultra-hide” or “one-coat” labels) cover better per pass, reducing the number of strokes needed.
- Low-spatter formula: Ceiling paints with spatter-resistant additives reduce the micro-droplets that hit your face and eyes, making the job less physically taxing (you won’t be blinking and flinching constantly).
- Flat or matte finish: Flat finishes are the standard for ceilings because they hide surface imperfections and reduce glare. They’re also more forgiving with lap marks, which means less time going back to fix problem areas.
- Appropriate viscosity: Ceiling paints tend to be thicker than wall paints, which helps them cling to the surface and reduces drips. Don’t thin ceiling paint unless the manufacturer specifically recommends it.
In 2026, popular choices among professional painters include Sherwin-Williams Ceiling Paint Plus and Benjamin Moore Waterborne Ceiling Paint, both of which offer low-spatter, high-hide formulations well-suited for one-coat coverage on previously painted surfaces.
Tool Comparison Table
| Tool / Method | Neck Strain Risk | Back Strain Risk | Coverage Speed | Recommended For |
|---|---|---|---|---|
| Short-handle roller (no pole) | High | High | Slow | Not recommended |
| 4–6 ft extension pole + 9″ roller | Low-Medium | Low | Medium | Standard 8–9 ft ceilings |
| 6–8 ft extension pole + 18″ roller | Very Low | Very Low | Fast | Best overall for most homes |
| Paint sprayer (airless) | Low | Medium | Very Fast | Large open spaces, experienced users |
| Rolling scaffold platform + pole | Very Low | Very Low | Medium-Fast | High ceilings, large projects |
Pain Risk by Painting Method
Here’s a visual comparison of body strain risk (combined neck + back score out of 10) for common ceiling painting approaches, based on ergonomic assessments compiled in the 2025 HFES report:
Short-handle roller (no pole)
Brush on short ladder (edge work)
4–6 ft extension pole + standard roller
6–8 ft extension pole + 18″ roller
Rolling scaffold + extension pole
Lower score = lower pain risk. Scores based on combined cervical and lumbar strain ratings from ergonomic assessments (HFES, 2025).
Common Challenges and How to Overcome Them
Challenge 1: Lap Marks and Uneven Coverage
One of the most frustrating ceiling painting problems — lap marks — actually causes more physical strain because it forces you to go back over areas multiple times. The fix is maintaining a wet edge: always roll into the wet paint from the last section rather than starting a new dry section. Work in manageable 3×3 foot sections, and keep your pace consistent. Rushing leads to dry edges and uneven coverage, which means more passes, more time, and more strain.
If you’re finding lap marks are a persistent issue, switch to a paint labeled “extended open time” or “wet-edge formula.” These give you an extra 1–2 minutes before the paint begins to set, which is enough buffer to blend sections cleanly.
Challenge 2: Paint Dripping on Your Face
Getting drips in your eyes or on your face isn’t just unpleasant — it causes you to flinch, tense up, and adopt defensive postures that strain your neck and shoulders. The solution has two parts:
- Wear safety glasses. Non-negotiable. Wraparound safety glasses cost under $5 and protect your eyes completely.
- Don’t overload the roller. The number one cause of ceiling drips is too much paint on the roller. After loading, roll it gently on the tray’s ridged surface 3–4 times to remove excess paint. The roller should feel saturated but not dripping when you lift it.
Challenge 3: Fatigue Causing Rushing
Here’s a real pattern: about 90 minutes into a ceiling project, fatigue sets in and the instinct is to rush — to push through and get it done. This is exactly when injuries happen and when quality drops. The fix is front-loading your energy management: do your most thorough work in the first session, before fatigue builds. If you’re tackling a large ceiling, plan across two days rather than forcing it into one exhausting day.
Case Study — Jennifer L., Interior Decorator, Portland OR (2026): Jennifer prepped a 600 sq ft vaulted ceiling for a client’s home renovation. Rather than a single marathon day, she split the work into three sessions of 90 minutes each over two days. Total working time was actually less than a single all-day session would have taken, because she maintained peak technique throughout. No pain. No touch-ups required. Perfect first-coat coverage.
Frequently Asked Questions
Can I paint a ceiling without a ladder at all?
Yes — and in most cases, you should. For the main body of the ceiling, a properly sized extension pole (matched to your ceiling height) allows you to paint from the floor with your head level and arms below shoulder height. The only time a step stool or low ladder becomes necessary is during the “cutting in” phase along the edges, where you need your brush close to the wall-ceiling junction. Even then, a simple 2-step stool is safer and more ergonomic than a full ladder for this detail work.
How long does it realistically take to paint an average ceiling?
For a 12×14 foot room (168 sq ft), a prepared, experienced DIYer using proper tools can complete one coat of ceiling painting in approximately 45–60 minutes of active work — not including setup and cleanup. With the 20-5 break structure, total elapsed time for one coat is about 75–90 minutes. Two coats, realistically, is a half-day project including rest time. First-timers should budget 20–30% more time. Rushing to beat a personal time record is how injuries and quality problems happen.
Is it better to use a paint sprayer for ceilings to reduce physical strain?
Airless paint sprayers do reduce the repetitive rolling motion and can cover large ceiling areas very quickly, which benefits the shoulders and neck. However, they come with significant trade-offs: extensive masking is required (every surface in the room must be protected from overspray), there’s a learning curve to achieving even coverage without runs, and airborne paint particles require respiratory protection. For most residential DIYers painting one or two rooms, a quality extension pole and roller remains the most practical and body-friendly option. Sprayers become more advantageous in new construction, empty spaces, or large open-plan homes where masking is less extensive.
Your Ceiling. Your Rules: A Paint-Day Action Plan
Here’s the bottom line: ceiling painting has a bad reputation for causing pain because most people approach it with the wrong tools, no plan, and the assumption that suffering through it is just part of the job. It isn’t. With the right preparation, the same project becomes manageable, even satisfying.
As smart home improvement practices continue trending toward DIY ergonomics in 2026 — a reflection of the broader movement toward preventive self-care and injury-conscious home renovation — there’s never been more quality guidance and better tools available to make overhead work genuinely body-friendly.
Here’s your immediate action checklist before your next ceiling project:
- ✅ Buy or borrow a 6–8 ft adjustable extension pole — this is your single most impactful investment. Budget $25–$45.
- ✅ Upgrade to an 18-inch roller frame and a fresh 3/4″ nap cover for faster, fewer passes.
- ✅ Raise your paint tray to waist height using a step stool or cart — no more bending to reload.
- ✅ Lay down anti-fatigue matting in your working zone before you start.
- ✅ Set a timer for 20-minute work intervals and do the 3-stretch reset on every break — non-negotiable.
- ✅ Wear safety glasses — yes, every time, even for “just a quick touch-up.”
The bigger implication here goes beyond ceiling paint: how you treat your body during physical home projects shapes how long you can keep doing them. Every ergonomic habit you build now adds years to your capacity for DIY work — and keeps you off the physio’s table.
So here’s the question to take with you: What’s one ceiling project you’ve been putting off because you dreaded the pain — and could you start it this weekend with a different approach?