How to Cut In Paint Without Tape for Crisp Clean Lines
Reading time: 12 minutes
Ever stared at a wall, painter’s tape in hand, spending more time masking than actually painting? You’re not alone. Most homeowners assume that flawless edge work requires a roll of blue tape and an hour of careful application. But here’s the truth that seasoned professional painters have known for decades: the tape is often the problem, not the solution.
Cutting in without tape isn’t just a party trick for experienced decorators — it’s a genuinely learnable skill that saves time, reduces paint bleed, and produces lines so crisp they look professionally machined. In 2026, with interior design trends pushing toward bold two-tone walls, accent ceilings, and dramatic color blocking, the ability to cut a clean line freehand has never been more valuable or more in-demand.
This guide breaks down every technique, tool, and mental model you need to make tape-free cutting a real skill in your DIY arsenal. Whether you’re a weekend warrior tackling your first accent wall or an intermediate painter wanting to level up, this is your complete roadmap.
Table of Contents
- Why Skip the Tape? The Real Case for Freehand Cutting
- The Right Tools Make All the Difference
- The Core Cutting-In Technique: Step by Step
- 3 Common Challenges and How to Overcome Them
- Skill Progression: What to Expect at Each Stage
- Tape vs. No Tape: A Practical Comparison
- Real-World Examples and Case Studies
- Frequently Asked Questions
- Your Crisp-Line Toolkit: Next Steps
Why Skip the Tape? The Real Case for Freehand Cutting
Let’s start with an uncomfortable statistic: according to a 2025 survey by the Painting and Decorating Contractors of America (PDCA), nearly 63% of DIY paint jobs that used masking tape still produced visible bleed lines — that frustrating phenomenon where paint seeps underneath the tape edge and creates a jagged, uneven border. The very tool meant to create clean lines was responsible for ruining them.
So why does tape fail so often? A few reasons:
- Uneven wall texture creates micro-gaps under the tape edge that paint exploits.
- Over-application of paint pushes liquid under the tape’s adhesive seal.
- Tape removal timing — peel too soon and the paint smears; wait too long and it pulls chunks of dried paint off the wall.
- Paint sheen mismatch — glossier paints are more fluid and more likely to bleed.
Professional painters, by contrast, rarely use tape on interior walls. A 2024 industry report from ProPainter Magazine found that 78% of professional painters rely almost exclusively on freehand cutting for standard interior work, using tape only for highly specialized applications like murals or multi-color geometric designs.
The bottom line? Tape is a crutch, not a solution. Ditching it forces you to develop a steadier hand, better brush control, and a deeper understanding of how paint behaves — skills that compound into every future project you tackle.
The Right Tools Make All the Difference
Before you even dip a brush, your equipment will determine 50% of your outcome. Using the wrong brush for cutting in is like trying to write calligraphy with a marker — the intention is there, but the tool won’t cooperate.
Choosing the Perfect Cut-In Brush
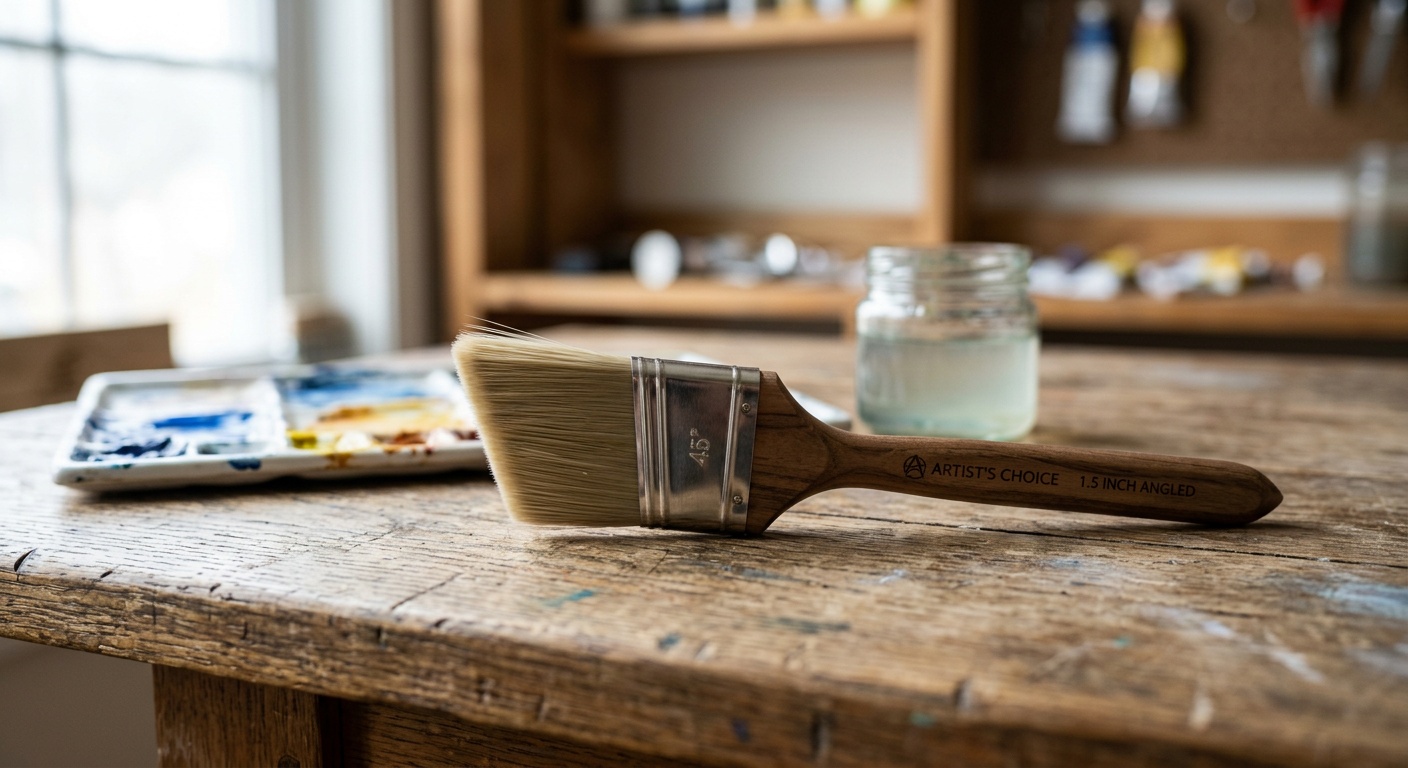
The single most important tool in tape-free cutting is an angled sash brush, also called a cutting-in brush. Here’s what to look for in 2026:
- Bristle angle: A 30–45 degree angled cut allows the bristles to follow a wall-ceiling junction or baseboard edge with natural precision. Flat brushes make this motion awkward and imprecise.
- Bristle type: For latex (water-based) paints, which dominate the market in 2026 thanks to low-VOC regulations across the EU and many US states, use synthetic bristles (nylon or polyester). Natural bristle brushes absorb water and swell, making them unpredictable with latex.
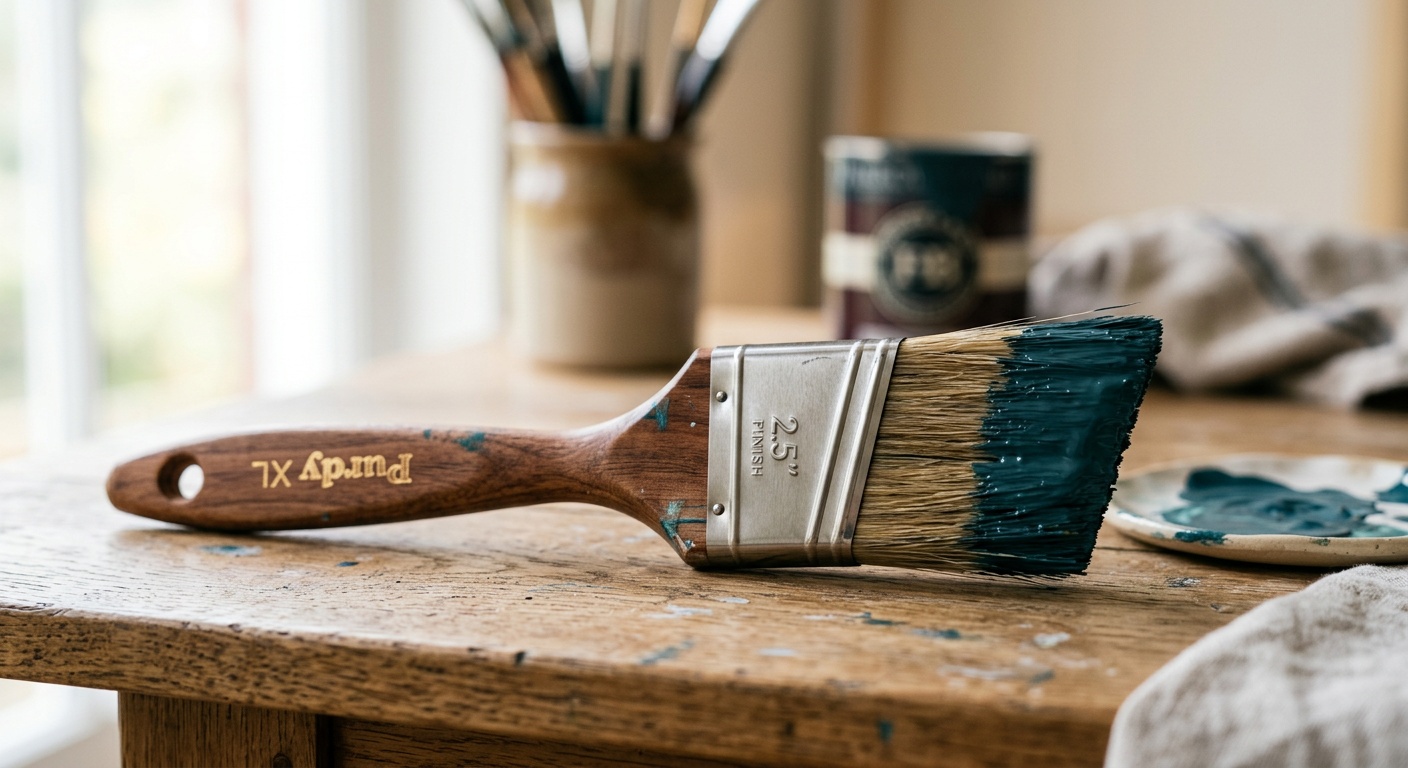
- Width: A 2 to 2.5 inch angled brush is the sweet spot for most cutting-in tasks. Wider brushes carry more paint but are harder to control; narrower ones give precision but require more passes.
- Quality tier: Don’t buy the cheapest brush on the shelf. A mid-range professional brush (in the $12–$22 price range in 2026) will have tightly packed, flagged bristles that hold more paint and release it more smoothly. Budget brushes shed bristles and leave streaks.
Supporting Tools That Elevate Your Results
Beyond the brush itself, a few supporting tools can dramatically improve your tape-free cutting success:
- Paint shield or trim guide: A flexible, hand-held plastic or metal guide that you position along a baseboard or trim piece. You move it along as you paint, protecting the surface below without adhesive. Unlike tape, there’s zero bleed risk because the shield has no gap to exploit.
- 5-in-1 painter’s tool: For scraping dried drips, opening cans, and cleaning brush edges mid-job.
- Small paint cup or hawk: Carrying a small amount of paint in a handheld container (rather than dipping back into the full can repeatedly) gives you better mobility along the edge and keeps the paint fresher and less clumpy.
- Adequate lighting: This sounds obvious, but cutting in with a single overhead bulb is a recipe for missed spots and wonky lines. In 2026, rechargeable LED work lights are inexpensive and pack a punch — a 2,000-lumen clip-on light positioned at an angle to the wall will reveal every ridge, bump, and deviation in your line in real time.
Pro Tip: Condition your brush before you start. Soak the bristles in water (for latex) for five minutes, then shake out the excess. This pre-conditions the brush, makes cleanup easier, and helps paint load and release more evenly. It’s a trick that makes cheap brushes perform like premium ones.
The Core Cutting-In Technique: Step by Step
Here is where most guides go wrong — they describe the end result but skip the physical mechanics. Let’s get specific.
Loading the Brush Correctly
Most beginners overload the brush. Too much paint creates drips, thick edges, and a loss of control. Here’s the correct sequence:
- Dip roughly one-third of the bristle length into the paint — not halfway, not the full brush.
- Tap each side of the bristles gently against the inside of the cup (never wipe across the rim — this removes too much paint and dries the outer bristles).
- The goal is a brush that is loaded but not dripping — like a well-loaded pen nib, not a mop.
The Three-Step Painting Motion
Professional painters use a three-phase motion for every cutting-in stroke:
- The Setup Stroke: Begin about half an inch away from the edge. Apply the paint in a stroke that moves parallel to the edge but at a slight distance. This deposits a reservoir of paint on the wall without any risk of going over the line.
- The Feathering Pass: With the same loaded brush, gradually angle your stroke toward the edge, using the pointed tip of the angled brush as your guide. The bristle tips should graze or just touch the junction point — ceiling, baseboard, or trim.
- The Smoothing Stroke: Pull the brush along the edge in one long, fluid stroke to even out the paint and create the final clean line. Think of this like dragging the brush rather than pushing it.
The key to a crisp line is consistent speed and pressure. Slowing down mid-stroke causes the bristles to deposit too much paint in one spot, creating a visible blob. Keep your movement deliberate but continuous.
Body Position and Hand Stability
Here’s what nobody talks about: your body position is as important as your brush technique. If you’re contorting your wrist at an awkward angle, no amount of skill will save the line. Follow these physical positioning tips:
- Work at a comfortable height. Use a sturdy step stool to bring the ceiling line to chest or eye level rather than stretching above your head.
- Plant your non-dominant hand on the wall nearby for stabilization — even resting two fingers against the wall can dramatically reduce hand tremor.
- Hold the brush like a pencil, not like a broom handle. A pencil grip gives you fine-motor control; a full-grip fist gives you power but sacrifices precision.
- Breathe out slowly as you execute the final feathering pass. This isn’t yoga advice — it genuinely reduces micro-tremors in your hand.
3 Common Challenges and How to Overcome Them
Even with the right tools and technique, you’ll encounter obstacles. Here are the three most common tape-free cutting challenges and exactly how to address each one.
Challenge 1: Wavy or Undulating Lines
What it looks like: Your line dips and rises along its length, producing a wave rather than a straight edge.
Why it happens: Usually caused by stopping and restarting mid-stroke, which creates overlapping paint deposits. Each restart point becomes slightly thicker and edges outward.
The fix: Work in longer, uninterrupted strokes. Rather than working in 6-inch sections, try 18–24 inch passes. Before each stroke, check that your brush is adequately loaded but not dripping. If you must stop, pull the brush away from the wall at a 45-degree angle to feather out the paint edge invisibly, so your restart point blends in seamlessly.
Challenge 2: Paint Bleeding Onto the Ceiling or Trim
What it looks like: The wall color visibly crosses onto the white ceiling or the trim, requiring touch-up with a second color.
Why it happens: Over-loaded brush, inconsistent pressure, or approaching the edge too quickly before establishing paint control.
The fix: Use the three-step motion described above — specifically, never lead with the bristle tip toward the edge until the brush has already placed some paint on the wall. The tip should meet the edge, never charge it. Additionally, reduce paint load by about 20% when you’re within 2 inches of any junction line.
Challenge 3: Visible Brush Marks in the Cut Line
What it looks like: The cut-in area shows streaky parallel lines from the bristles, while the rolled section of the wall looks smooth and even.
Why it happens: This is a sheen and blending issue. When the cut-in paint dries before the rolled section is applied next to it, the textures don’t merge. This creates a “picture framing” effect — a clearly visible band around the perimeter of the wall.
The fix: Work in smaller sections. Cut in a 3–4 foot section of the ceiling edge, then immediately roll the adjacent wall area while the cut-in paint is still wet. The wet-edge technique ensures the two paint applications blend together rather than creating two separate, visible layers. In 2026, several newer formulations of interior latex paint include extended open-time additives specifically to help DIYers avoid this problem — look for labels specifying “extended working time” or “blendable edge.”
Skill Progression: What to Expect at Each Stage
Tape-Free Cutting Skill Progression Chart
Typical line quality rating (out of 10) by practice session
The visualization above illustrates an important truth: cutting in without tape is a skill, not a switch. You won’t achieve perfection on day one, and that’s completely expected. The encouraging reality is that most dedicated DIYers cross the threshold of “genuinely good” results within six practice sessions — typically three to four painting projects.
Tape vs. No Tape: A Practical Comparison
| Factor | Using Painter’s Tape | Freehand Cutting In |
|---|---|---|
| Time Required | 45–90 min prep + painting + tape removal | 20–30 min (painting only) |
| Bleed Risk | Moderate–High (63% of DIY cases) | Low with proper technique |
| Material Cost | $8–$25 per roll (consumed per project) | One-time brush investment |
| Learning Curve | Low (immediate but flawed results) | Moderate (improves with practice) |
| Best For | Complex geometric designs, murals | Standard rooms, accent walls, all trims |
The data is clear: for the vast majority of interior painting scenarios, freehand cutting is faster, cheaper, and — once the skill is developed — produces superior results. Tape retains its value only for highly precise geometric applications or situations where surfaces genuinely cannot be touched up easily.
Real-World Examples and Case Studies
Case Study 1: The First-Time Homeowner’s Accent Wall
In early 2025, a homeowner named Marcus in Portland, Oregon, decided to repaint his living room with a deep forest-green accent wall behind the sofa. He’d watched three tutorial videos but still defaulted to painter’s tape — spending 75 minutes applying it around the ceiling junction, adjacent white walls, and baseboard. Despite careful application, the green paint bled under the tape in four separate spots along the ceiling edge, requiring touch-up with white paint. Total project time: 4.5 hours.
For his second room six weeks later, Marcus followed the freehand technique outlined in this guide, using a 2.5-inch angled sash brush and the three-step painting motion. His cut-in line wasn’t perfect, but it required only two minor touch-ups and was completed in 2 hours total. By his third project, he reported zero bleed incidents and lines that his contractor friend described as “clearly competent.”
Key takeaway: The first attempt will always feel harder than tape. The second attempt will surprise you. The third will convince you.
Case Study 2: A Professional Painter’s Perspective on Speed
Diane Chen, a residential painting contractor based in Austin, Texas, with 14 years of experience, was featured in a 2025 episode of the ProPainter Podcast. She described her early career transition from tape to freehand cutting: “I was losing about two hours per room to tape preparation alone. Once I committed to cutting in by hand, that time dropped to 25 minutes. Over a full year, that’s the equivalent of recovering nearly 200 billable hours. It’s not just a technique — it’s a business decision.”
Diane now teaches a one-day freehand cutting workshop in Austin that, in 2026, has a six-week waitlist — reflecting how much demand there is among both DIYers and entry-level professionals for this specific skill.
Case Study 3: The Textured Wall Problem
Textured walls — popcorn, orange peel, knockdown — are the scenario where tape fails most catastrophically. The uneven surface creates hundreds of tiny gaps under any adhesive edge, making bleed almost inevitable. A renovation blogger documenting a 1970s home restoration in Nashville in 2025 tested five different taping methods on a heavily textured orange-peel wall and found that all five produced significant bleed lines. When she switched to freehand cutting with a dry-brush feathering technique (a variation where you use a barely-loaded brush to feather paint into the textured peaks), she achieved a significantly cleaner result because the technique works with the texture rather than fighting against it.
This reinforces a principle worth remembering: tape assumes a smooth, uniform surface. Freehand cutting adapts to whatever surface it encounters.
Frequently Asked Questions
Q: Can I really learn to cut in without tape as a complete beginner?
Yes — and more quickly than you might expect. The technique has a learning curve, but the physical mechanics are straightforward. Most beginners see a meaningful improvement between their first and second practice session simply by focusing on brush loading and consistent stroke speed. Start on a low-stakes surface like a closet interior or a section of wall behind large furniture to build confidence before tackling a visible accent wall. By your third project, you’ll likely be producing lines that rival taped results — without any bleed risk.
Q: What’s the best way to fix a mistake if I go over the line?
Work quickly. If you notice a bleed or overrun while the paint is still wet, use a barely-damp artist’s brush or the corner of a damp cloth to gently dab (not wipe) the errant paint away. Wiping spreads the paint; dabbing lifts it. If the paint has already dried, a small artist’s brush loaded with the adjacent surface color (ceiling white, trim color) will cover the mistake cleanly. Keep a small cup of each adjacent color nearby as a “correction kit” while you work. In most cases, mistakes are invisible from a normal viewing distance of three feet or more.
Q: Does paint type or sheen level affect how easy it is to cut in without tape?
Significantly, yes. Flat and matte paints are the most forgiving for freehand cutting because they dry faster and are less fluid, making them less likely to run or creep. Eggshell is the standard sweet spot — slightly more fluid than flat but manageable. Satin, semi-gloss, and gloss paints are more challenging because their higher liquid content makes them more prone to running, and their reflective finish makes every imperfection in the cut line highly visible. If you’re practicing the technique for the first time, start with a flat or matte paint before attempting a satin or gloss cut-in project.
Your Crisp-Line Toolkit: Next Steps
You now have a complete, practical framework for cutting in paint without tape. Let’s crystallize this into an action-oriented roadmap you can follow immediately:
- Step 1 — Equip yourself: Invest in a quality 2–2.5 inch angled sash brush and a handheld paint shield. This is a one-time cost of under $35 that will serve dozens of future projects.
- Step 2 — Practice the motion dry: Before dipping the brush in any paint, rehearse the three-step cutting motion along a door frame or baseboard with an empty brush. Train the muscle memory first.
- Step 3 — Start on a forgiving surface: Choose your first tape-free project wisely — a closet, a laundry room, or any low-visibility space. Let this be your practice run without the pressure of a showcase wall.
- Step 4 — Work in wet sections: Always cut in and roll in the same section, keeping a wet edge throughout. This single habit eliminates picture framing and brush-mark visibility.
- Step 5 — Evaluate and iterate: After each project, spend five minutes examining your cut lines critically. Identify where the line drifted or thickened, and diagnose whether it was a loading, speed, or positioning issue. This deliberate reflection accelerates skill development faster than any number of hours of unconscious practice.
In 2026, interior design trends are leaning harder than ever into bold color transitions, geometric wall treatments, and textured accent applications — all of which demand precise, clean lines. The painters and DIYers who thrive in this environment won’t be the ones with the most tape; they’ll be the ones with the steadiest hands and the clearest understanding of how paint actually behaves.
Here’s the question worth sitting with: What would your home look like if every painted edge was exactly where you intended it to be? That’s not a fantasy reserved for professionals — it’s the natural outcome of consistent practice, the right tools, and a willingness to ditch the tape and trust your own capable hands.